How to Change Battery Acura ILX
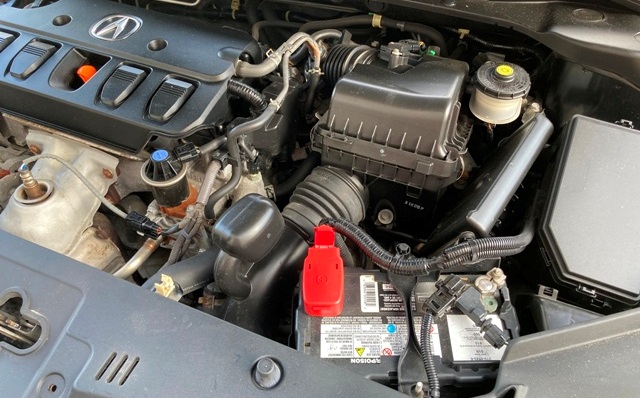
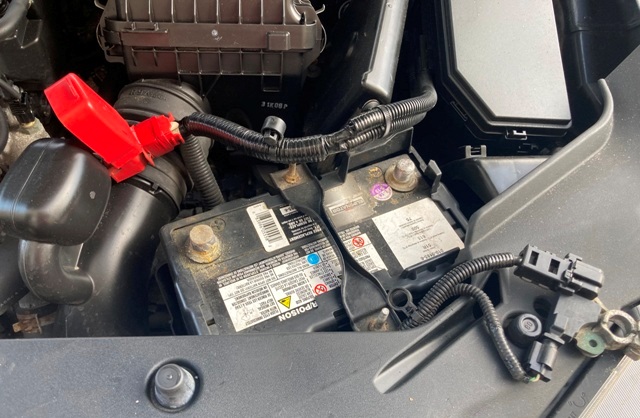
How to Change Battery Acura ILX: 2014 Acura ILX 4 cylinder engine. Battery is located on engine bay, drivers side. Honda Civic has exact same procedure, Acura ILX is based on Civic platform.
Diagnosing a Bad Battery
Car batteries usually last about 4 to 5 years depending on battery quality and environment (climate).
If you need to test it, can test battery in your car easily, all you need is a multi-meter/voltmeter: How to Test Car Battery and Alternator. Voltage should be higher than 12 volts when engine is not running. Voltages lower than 12 volts indicate a weak battery which should be replaced.
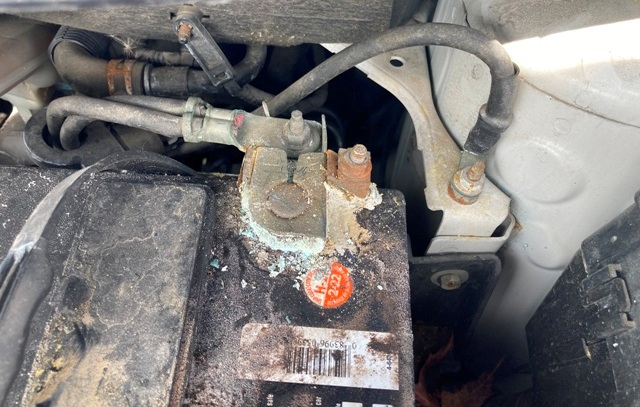
If battery terminals are corroded (something like image below), you need to clean those first before replacing battery.
Use water and brush to clean up battery terminal corrosion but wear gloves and glasses as battery acid is quite corrosive. Try to not touch it with bare hands.
Corrosion is a sign of battery failure. Usually, corrosion on battery terminals is caused by battery acid leak, either from battery terminal posts or cracked battery case. Either way, battery will need to be replaced. More details on Symptoms of Bad Battery.
Battery Type Acura ILX
Battery type for 2014 Acura ILX is 51R 410 and costs about $150, depending on brand and quality. Make sure to indicate year and vehicle model when purchasing a new battery, just to confirm you dont get wrong battery type.
Tools: All bolts are 10mm, you need only a deep 10mm socket and ratchet to replace battery, and some grease. A 10mm wrench will do too but its easier with socket and ratchet.
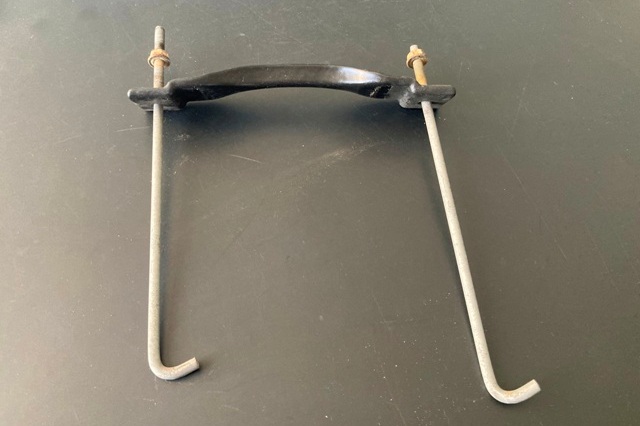
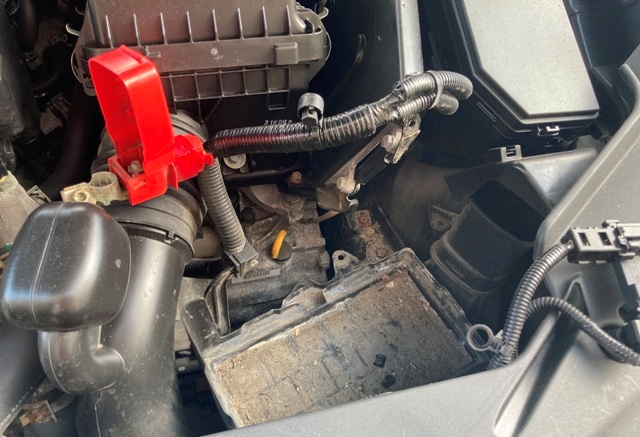
Battery is held in place with hook style bracket (image below). Battery bracket has two hooks inserted on car chassis and two 10mm bolts on top.
How to Change Battery Acura ILX: Removal
Be careful not to touch both battery terminals simultaneously with tools or anything metallic while working. You will short battery and blow it up.
Remove keys from ignition and open hood. Locate battery, its on drivers side up front, close to headlight.
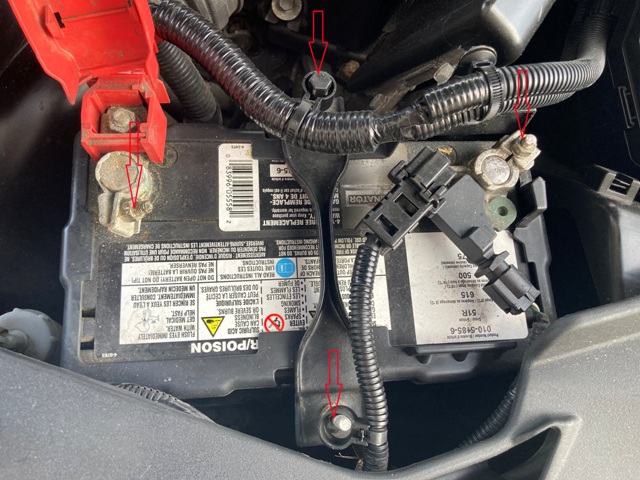
1) Loosen clamp bolt and remove ground wire (Black -). Always remove ground or negative wire first when removing a battery.
2) Open positive terminal cover and loosen 10mm bolt. Remove positive battery terminal clamp (Red+). Push battery clamps aside as to not interfere with battery removal.
3) Remove battery bracket 10mm bolts, you dont need to completely remove bolts. Just loosen bolts enough to allow for removal of bracket hooks. One of the bracket bolts has a plastic clip holding battery cable. Remove clip by pulling on it and then losen bracket bolt.
4) Turn battery bracket hooks to release them from holes and remove battery bracket.
5) Remove plastic shield from battery. Lift it upwards to remove it. You might not have a battery shield on your car, sometimes people dont bother to put them back in when replacing battery.
6) Next, lift and remove battery. Careful its heavy and it needs a bit of twisting to come out.
7) Clean up battery tray and surrounding from dirt and debris. You can use water or a vacuum cleaner, it works either way.
How to Change Battery Acura ILX: Installation
Make 100% sure to not mix up battery terminals when installing new battery. If that happens, you will blow up things, hopefully just a fuse and not a control module.
Positive clamp should go on positive battery terminal and Negative clamp on negative battery terminal.
Positive(+) and Negative(-) terminals are clearly marked on battery case next to terminal posts.
1) Clean up battery terminal clamps. If clamps are rusted you can used sandpaper to remove rust, as much as possible.
2) Battery bracket hooks can be a pain sometimes to put them on their opening. Take a look and notice bracket hooks holes location prior to installing new battery. Will come handy latter.
3) Place new battery on battery tray. Make sure battery is positioned flat and steady on battery tray. Install battery plastic shield.
4) Insert battery hooks on chassis holes. Tighten battery bracket 10mm bolts, one at the time. Do not over-tighten them, as long as battery is firmly in place and doesn’t move, thats good enough.
5) Install battery positive/power terminal (Red+) clamp and tighten clamp bolt. Install ground/negative terminal clamp and tighten bolt. Install positive cable clip on top of bracket bolt.
6) Apply grease to both battery terminal clamps. Grease will prevent corrosion of battery clamps in the future.
Start the car to confirm everything is running properly and you are done. Collect tools and close the hood.
(If you are also looking for a fast and easy solution to sell your car, more here on “How To Sell Your Car Fast” in Ontario)
Comments: If you have any questions or suggestions related to this post or Used Car Toronto in general, don’t hesitate to use comment section below.


