How to Change Battery Mitsubishi Outlander
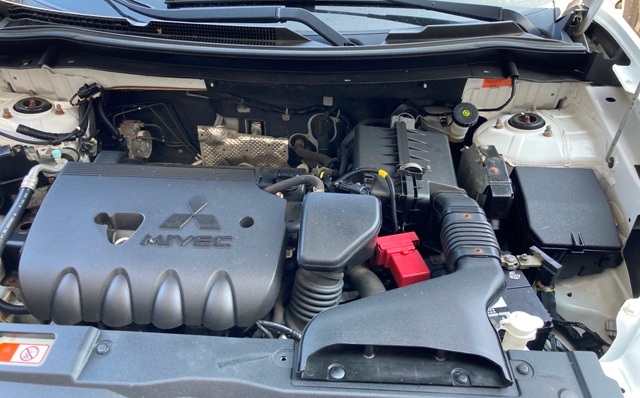
How to change battery Mitsubishi Outlander: Vehicle is a 2014 Mitsubishi Outlander, 4 cylinder, 2.4 liter engine.
Bad Battery Symptoms
Car batteries usually last about 4 years, give or take. Symptoms of a failed battery include: Sluggish starter operation, dim or flickering lights, sulfuric smell, corrosion on battery posts, slow operation of electrical accessories. Test and replace battery is you experience these symptoms.
Also, car batteries can die without symptoms, in this case battery cells are shorted and battery will lose charge all of a sudden. You turn off your car, and you come few hours latter to find battery completely dead.
That’s why is important to periodically test batteries over 3 years old, especially prior to winter. Testing battery at home is easy and requires only a cheap multi-meter or voltmeter ($15 or so).
Battery voltage with engine off, should higher than 12 volts. If you battery is lower than 12 volts, you should replace it. Details on: How to Check Battery and Alternator.
Mitsubishi Outlander Battery Type
Battery type is 26R-3 575 crank amps, however there are more powerful choices, if you prefer. Type 35-2 640 crank amps or AGM-35 at 650 crank amps. Prices for Outlander batteries start from $150 all the way up to $250, depending on brand and cranking power.
Tools: Battery clamps and bracket bolts are all 10mm. You need a 10mm deep socket, ratchet, flat screwdriver and some grease. Changing battery on Mitsubishi Outlander is fairly easy and should take about 30 minutes or so.
Battery Corrosion
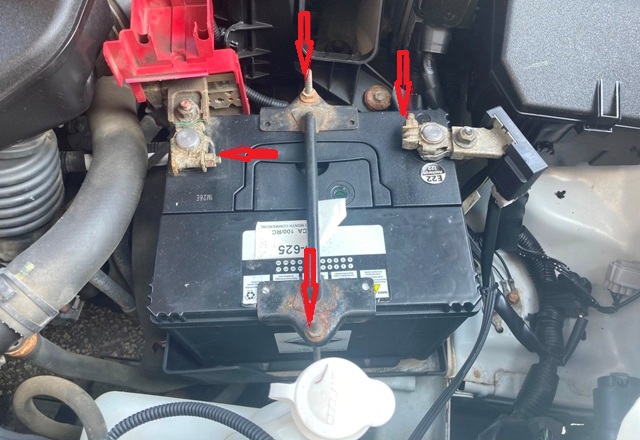
Check battery terminal posts for corrosion prior to removing battery. If you have corrosion, clean it with water and brush, before you start working on it. Wear gloves and watch your eyes as battery corrosion is usually caused by acid vapor leaks and is very corrosive.
Corrosion of battery terminals indicate a failed or failing battery which should be replaced.
Battery Bracket Mitsubishi Outlander
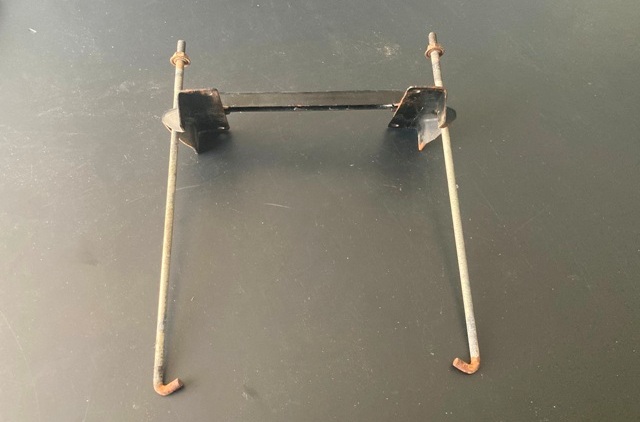
Battery is secured in place with a hook style bracket. Bracket has two hooks inserted on battery tray and two 10mm bolts. Most Asians vehicles use this style of bracket (Honda, Toyota, Hyundai, Kia, etc).
Loosening (not completely removing) 10mm bracket bolts will release hooks from vehicle chassis and bracket can then be removed.
(If you are also looking for fast and easy solution to sell your car, more here on “How To Sell Your Car Fast”. )
Mitsubishi Outlander Battery Removal
Before you start working, make sure you dont touch both battery terminals simultaneously with anything metallic (tools, wrenches, etc). You will short battery and have a small explosion on your hands.
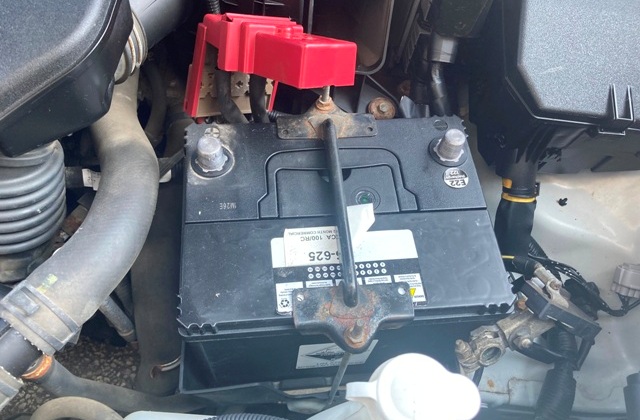
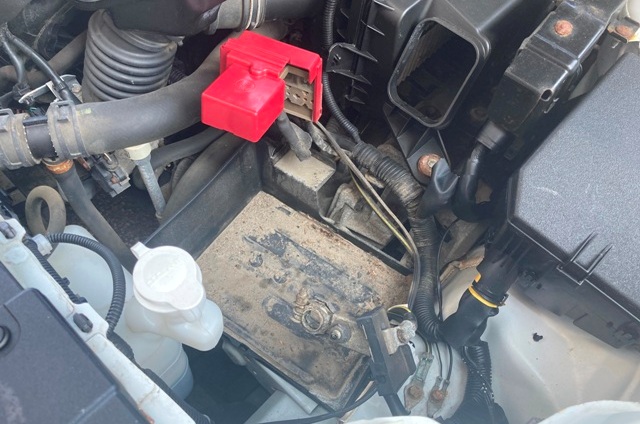
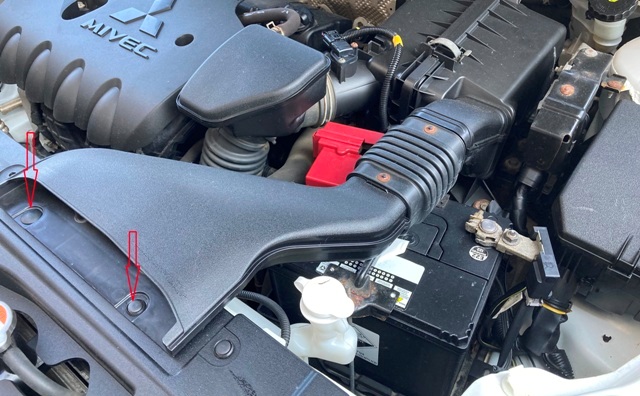
1) Remove keys from ignition and locate battery. Mitsubishi Outlander battery is located under hood, on drivers side close to left headlight.
2) Remove engine air intake duct clips. Use flat scredriver to lift center part of intake clip and pull clips out. Pull to separate intake duct from air filter.
3) Loosen 10mm bolt and remove negative/ground battery terminal clamp (Black -). Twist it around if its hard to remove and use screwdriver as a lever to pop it out of place.
4) Open positive terminal red caver, loosen bolt and remove power/positive battery clamp (Red-). Place battery clamps on the side as to not interfere with battery removal.
5) Loosen 10mm bolts on battery bracket (image above). Do not remove bracket bolts completely, just loosen then enough to gain slack for removing bracket hooks from chassis holes.
6) Twist battery bracket hooks to release then from chassis holes. Remove battery bracket.
7) Lift and remove battery. Battery is heavy, take it easy when you lift it out.
Mitsubishi Outlander Battery Installation
Do not Interchange battery polarity by accident or you will fry electronic stuff in your car. Confirm battery polarity before installing it.
Red (positive +) clamp should go on positive battery terminal and Black (negative -) clamp should go on negative battery terminal. Polarity is clearly marked on battery case next to each battery post.
1) Battery tray will be quite dirty. Clean battery tray from dirt and debris. Use water or vacuum cleaner.
2) Take a look and locate battery bracket holes, see holes location and position. You will need it when installing bracket hooks latter on, its a bit hard to see with battery in place.
3) Lift battery and place it on battery tray, make sure is sitting flat and secure. Again, check battery polarity before installing it.
4) Insert battery bracket hooks on chassis holes and tighten bracket 10mm bolts. Don’t over-tighten bolts, as long as battery is secure and doesn’t move, its good enough.
5) Install battery positive clamp (on battery positive post +), press it in all the way and tighten 10mm clamp bolt. Close clamp plastic cover.
6) Install battery negative clamp (on battery negative post -) and tighten clamp bolt.
7) Install intake duct. Insert intake duct on filter opening first and then install plastic clips.
8) Apply grease on both battery terminal posts. Grease will prevent corrosion of battery posts and clamps.
Check everything is tight and secure and start your car. Leave it running for a minute to check operation. Close hood and you done.
(If you are also looking for a fast and easy solution to sell your car, more here on “How To Sell Your Car Fast” in Ontario)
Comments: If you have any questions or suggestions related to this post or Used Car Toronto in general, don’t hesitate to use comment section below.


